Rock tumbling is a captivating activity that can yield beautifully polished stones, turning rough, natural wonders into sparkling jewels ready for display. Each stone has a unique character and history, waiting to surface through the tumbling process. Whether you are a beginner wanting to explore the world of rock tumbling or an experienced tumbler aiming to refine your skills, understanding the ins and outs of this process is essential.
This guide will cover everything you need to know about rock tumblers, from the fundamentals of the tumbling process to advanced techniques that will enhance your results. You will learn how to choose quality rock tumblers suited to your needs, how to prepare your stones for tumbling, and the best practices for achieving that perfect shine.
The History of Rock Tumbling
The practice of rock tumbling goes back thousands of years, with evidence suggesting that ancient civilizations used rudimentary methods to smooth and polish stones for decorative and practical purposes. As early as 4000 BC, people in Mesopotamia were crafting beads and ornaments from naturally occurring stones, demonstrating a primitive understanding of the tumbling process.
The modern evolution of rock tumbling began in the 19th century with the invention of the rotary rock tumbler, which revolutionized rock polishing the natural way. These early machines utilized abrasive materials and mechanical motion to accelerate the polishing process, making it more efficient than manual methods.
Today, advancements in technology have led to precision tumblers that offer various drum sizes, speeds, and features, making rock tumbling accessible around the world. This historical journey highlights the artistry involved in transforming rocks and how it connects people across cultures and generations.
The Basics of Rock Tumbling
Rock tumbling involves a series of steps, beginning with selecting the right stones for tumbling. Beginners often start with softer, more forgiving materials such as agate or jasper, which are less likely to chip or break during the process.
As you gain experience, you may choose to experiment with harder stones to achieve various results. Understanding the hardness scale is crucial for selecting compatible stones for tumbling together, as incompatible hardness levels could lead to unsatisfactory results.
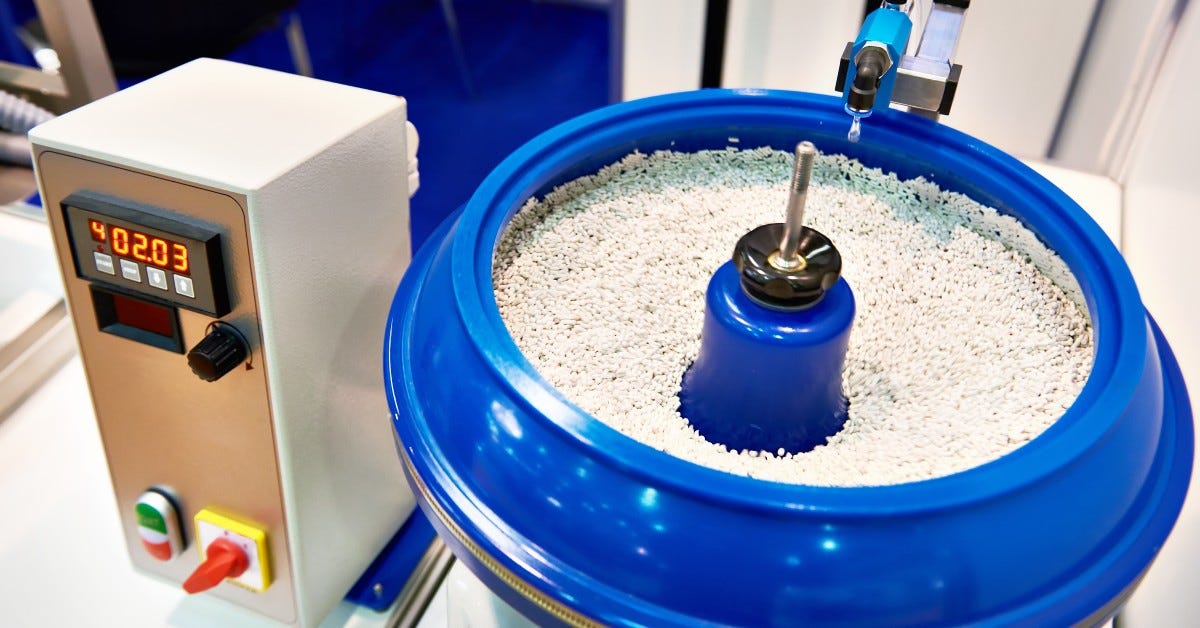
Choosing a Rock Tumbler
Selecting a rock tumbler is one of the most critical steps in your journey because it will determine the finish of your rocks. Quality rock tumblers come in various shapes and sizes, designed for different levels of use, from hobbyist models to heavy-duty machines suitable for more extensive operations.
When choosing a rock tumbler, consider factors such as barrel capacity, motor power, and noise levels. A reliable tumbler will not only enhance your experience but will also provide consistent, reliable results in your tumbling projects.
Preparing Your Stones for Tumbling
Before you start the tumbling process, proper stone preparation is essential. This step involves cleaning your stones thoroughly to remove any dirt or debris that may affect the tumbling outcome. Start by submerging your stones in soapy water to loosen any dirt and debris. Use the soft brush to gently scrub the surfaces, paying special attention to crevices where grime can accumulate. It’s important to be gentle, as abrasive scrubbing can scratch softer stones.
Inspect your stones for defects, as damaged or cracked stones can lead to inconsistent polishing and ruin your batch. Superficial cracks may still allow the stone to go through the tumbling process if they are minimal, while deeper cracks often indicate that the stone may break during the grinding process. By ensuring your stones are clean and intact, you lay the groundwork for a successful tumbling experience.
The Tumbling Process Explained
The tumbling process has four main stages: coarse grinding, medium grinding, fine polishing, and rinsing. Each stage serves a distinct purpose and requires specific grit sizes to effectively transform rough stones into polished gems.
• Coarse Grinding – At the beginning of the tumbling process, you must add coarse grit, typically 60/90 mesh, to the tumbler along with the stones and water. This stage lasts approximately 7 to 10 days, depending on the hardness of the stones. The purpose of coarse grinding is to remove large imperfections and shape the stones.
• Medium Grinding – Following the coarse grind, the stones move on to medium grinding, where you must use a finer grit, usually 120/220 mesh. This stage typically lasts another 7 days. The goal here is to further smooth the stones and eliminate any scratches or uneven surfaces.
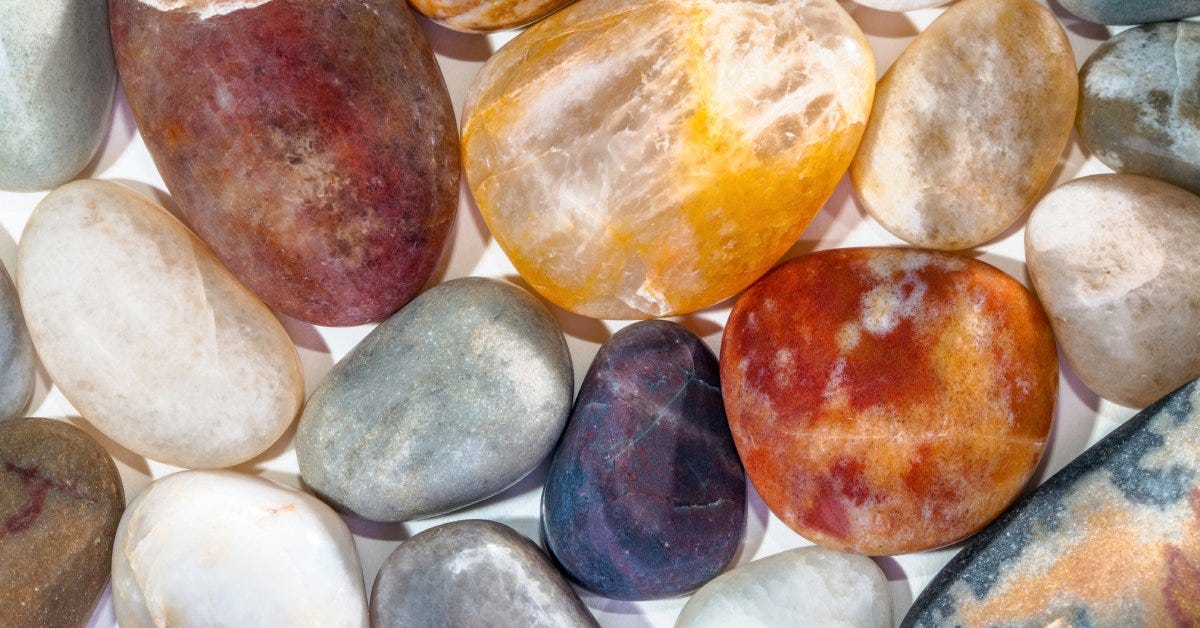
• Fine Polishing – The fine polishing stage employs even finer grit, often ranging from 500 to 1000 mesh. This is where the stones begin to truly shine, gaining their lustrous appearance. Fine polishing generally takes about 7 to 14 days, depending on the desired result.
• Final Rinse – Once the polishing is complete, a thorough rinse of the stones is crucial to remove any remaining grit and polishing compound.
By adhering to these distinct stages and closely monitoring the process, you’ll be able to achieve optimal results and create stunning polished stones that showcase their natural beauty.
Safety Precautions and Maintenance
Rock tumbling entails some precautions to ensure the safety and longevity of your equipment. Always keep the tumbler on a stable surface to prevent tip-overs, and avoid overfilling the barrel, as excessive weight can strain the motor.
Regularly check the rubber barrel for wear and tear, and clean out any debris to prevent contamination of the grit. Proper upkeep enhances your tumbler’s operational lifespan and ensures quality output with every batch.
Troubleshooting Common Issues
Troubleshooting common issues is one of the main things you should know about rock tumbling to ensure a successful project. If you notice that your stones remain dull or unpolished after the fine polishing stage, it could indicate that you did not use enough grit or that the grit has become contaminated with grainy particles, preventing a shine from developing. In this case, consider adding fresh grit and allowing the process to run for a few more days.
Excessive noise during operation often signals an imbalance or an improper load within the tumbler. If you pack the stones too tightly, they may not be able to move freely, resulting in uneven wear and added strain on the motor. Periodically check the barrel contents and adjust the load by removing some stones or redistributing them for a more balanced configuration.
Rock tumbling is not just a hobby; it’s an art that combines patience, precision, and creativity. As you embark on your tumbling journey, remember that practice makes perfect. Embrace the learning curve and take the time to experiment with different stones and techniques. With each batch, you will gradually refine your skills and produce stunning polished stones that reflect the beauty of nature.